Everything Cloud

Setup your own forever free virtual server – 24GB RAM, 4 vCPU on Oracle Cloud

In this blog, I will be writing on how to set up a virtual machine on Oracle Cloud which is free forever! This is great for those who want to try out WordPress and see how it works or for those who just want a free virtual server. We will be using the Oracle Cloud dashboard to set up our server.

Oracle cloud is comparatively new to the cloud market but has a variety of offerings.

OCI free virtual server
The above image shows the always free services, but we are mainly focused on the highlighted one. “4 Arm-based Ampere A1 cores and 24 GB of memory usable as one VM or up to 4 VMs. That’s it, this is what we’ll be using for creating our free virtual server

First, you’re going to log in so Head Over And Sign Up if you have not done so yet.

Important! Wait, don’t go yet! When signing up for a free tier account, you’ll need to select a “home region” which will be the only region that you can create your free VM in.

Geeting the OCI account approved can take up to 48 hours at times. Once you have the OCI account ready, you can proceed with the below steps

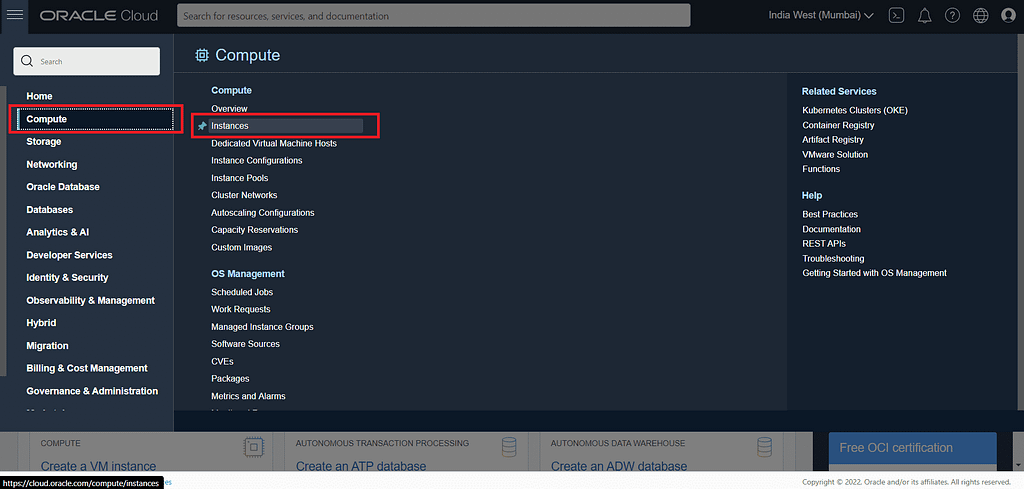
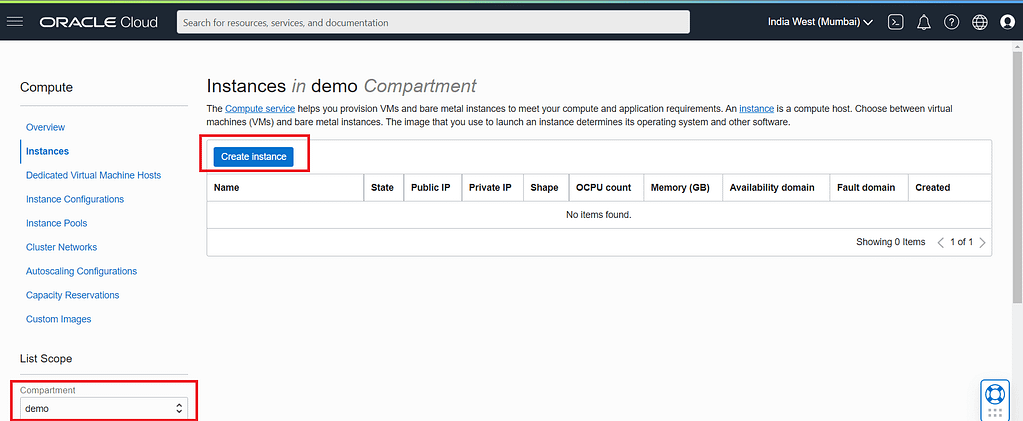
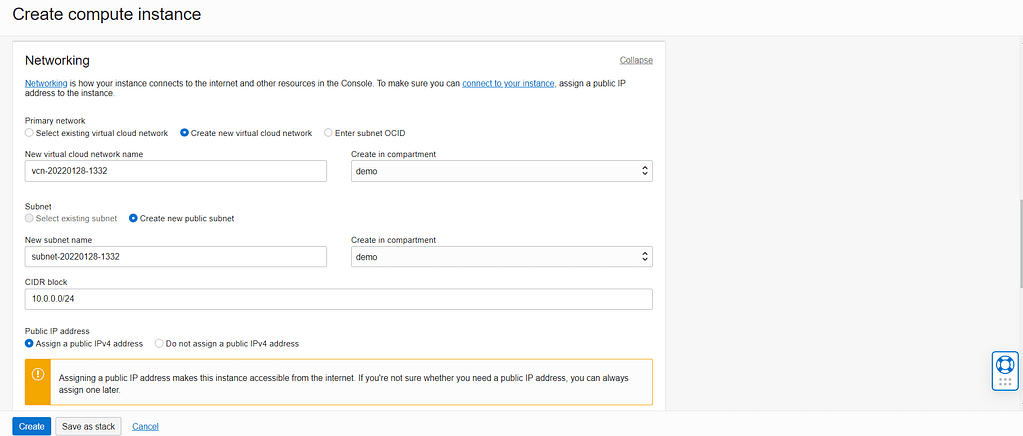
Creating an Virtual Machine in Oracle Cloud

Login to OCI using your credentials and check the region, the region should be the same as your home region selected while creating the account
Next, click on the hamburger icon on the top left which should list all the services. Click on compute and select Instances
Check the compartment where you want to deploy your instance and click on create an instance
Give a name of your desire to the instance, select compartment, and select the availability domain
While selecting Image and Shape of instance, choose “Oracle Linux 7.9” as image and “VM.Standard.A1.Flex” as shape. Scroll to 4 No. of OCPUs and 24 GB of Memory (Note: this is the maximum configuration you can have under the OCI free tier)
The networking part is where you will define Virtual Cloud Network, Subnets, CIDR for your Virtual Machine. If you are not familiar with all the terminologies then don’t worry and select the parameters as shown in the image above. Just change the names as per your liking, or don’t, whatever suits you.
Select “Generate a key pair for me” (download both private and public keys, this will be used later to connect to the virtual machine).
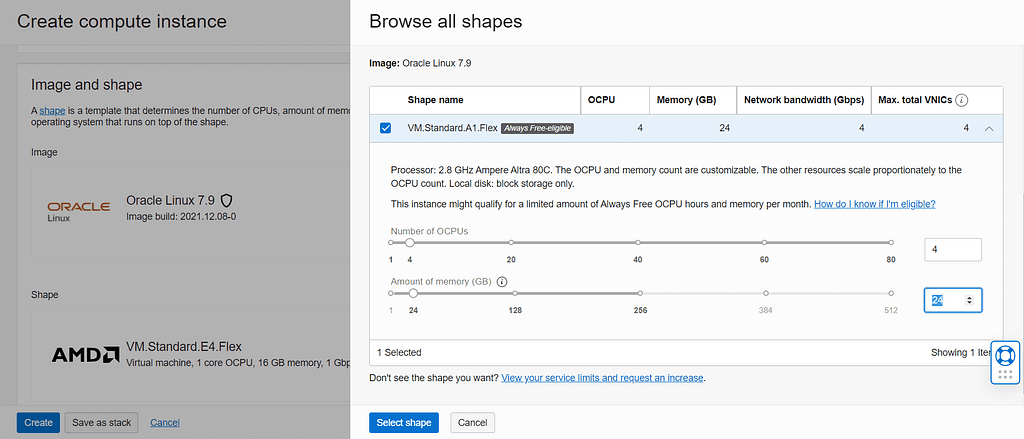
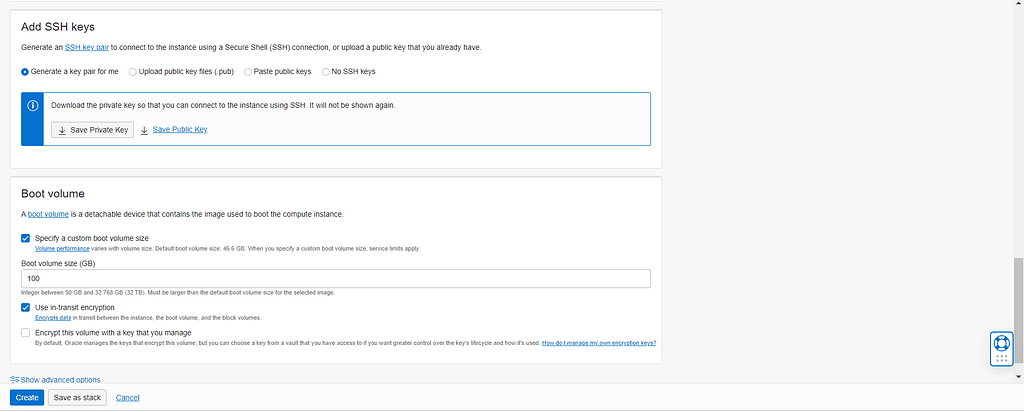
Select the checkbox “Specify a custom boot volume size” (your free tier has 200 GB of block storage access). 100 GB of boot volume should be enough.

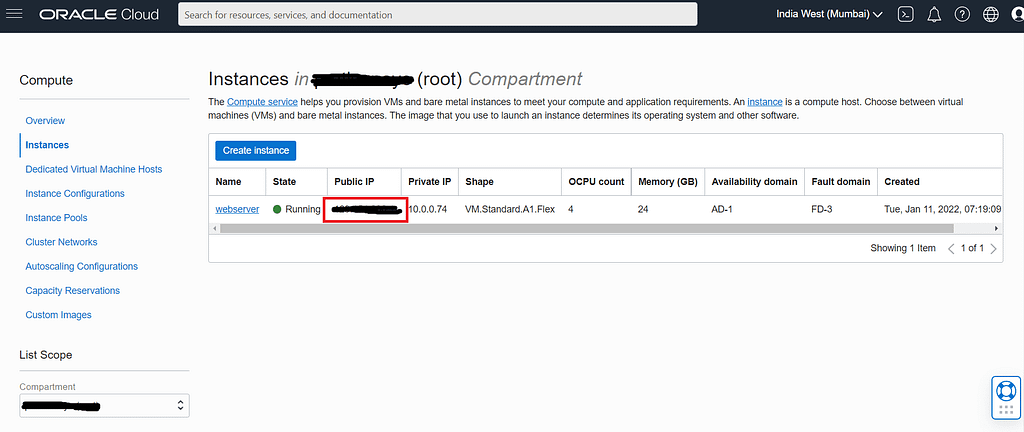
That should be all, click Create at the bottom left, and after a few minutes your free virtual server with 4 vCPUs & 24GB Memory should be up and running

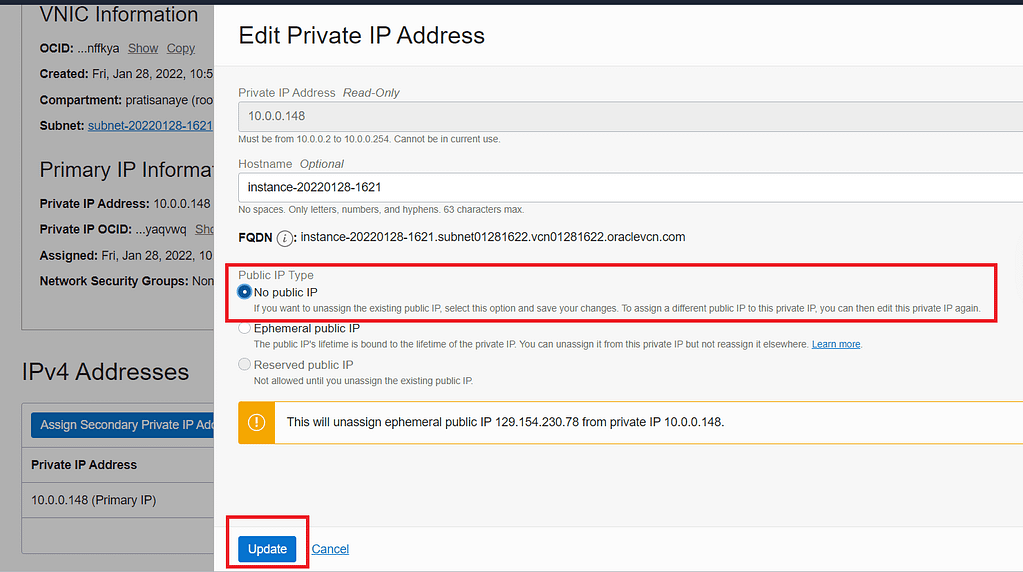
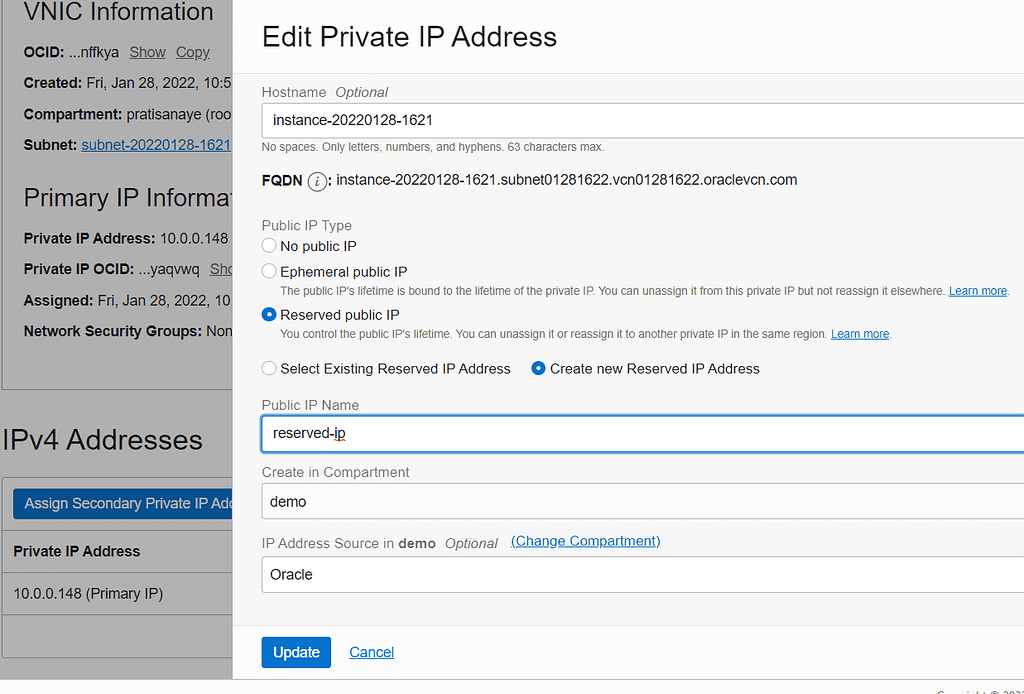
(Optional) Assigning Reserved public IP
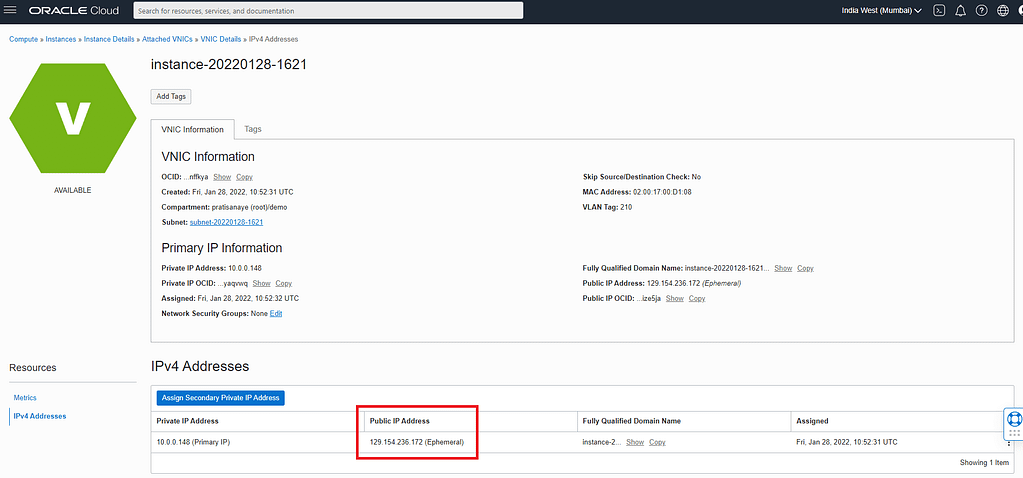
Types of Public IPs

There are two types of public IPs:

  • Ephemeral: Think of it as temporary and existing for the lifetime of the instance.
  • Reserved: Think of it as persistent and existing beyond the lifetime of the instance it’s assigned to. You can unassign it and then reassign it to another instance whenever you like. Exception: reserved public IPs on public load balancers. See Overview of Public IP Addresses.
Navigate to “Compute >> Instances >> Instance Details >> Attached VNICs >> VNIC Details >> IPv4 Addresses” in OCI. Notice the red marking on the above screenshot, it says Ephemeral. We have to change that to Reserved IP.
Click on the 3 vertical dots and select “Edit”
Click on “No public IP” and hit Update
Again, select 3 vertical dots and click “Edit”
Select “Reserved public IP”, give a name, select “IP Address Source” as “Oracle”. Hit update next and you should have a Reserved IP for your Virtual Machine

Connecting to the Free Virtual Machine

Connect to the Virtual Machine by heading to the Compute > Instances page, you should be able to see your provisioned instance. Copy the public IP
Open PuTTY and connect as opc@<<public ip>>, port 22. By default port 22 is open when the virtual machine is provisioned in OCI
On the left panel, under “Connection” -> “SSH” -> “Auth”, click on browse and select the .ppk file which we saved earlier while provisioning the machine

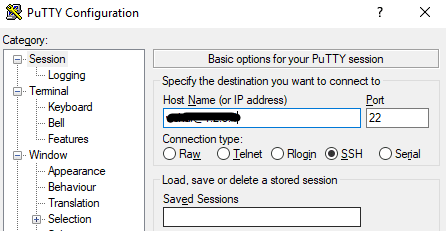
Congratulations! If everything is done right, you should be able to connect to your free virtual server

Vishal Kanade
Vishal Kanade

Leave a Reply

Your email address will not be published. Required fields are marked *

Featured Today

Socials Share

Share on facebook
Facebook
Share on twitter
Twitter
Share on linkedin
LinkedIn

Discover

Related Posts